Spring is showing off – and we’re here for it. As the trees fill out, the flowers burst forth, and the birds get louder than your kids on pancake day, it’s the perfect time to slow down and bring some of that beauty into your home.
This month’s handicraft plan features four simple, meaningful spring crafts rooted in nature. Each one is hands-on, lovely to look at, and practical – just the way we like it. These crafts are great for all ages and give your kids a way to observe, appreciate, and create with what God’s put right outside our front doors.
Each month, we release a simple handicraft plan that encourages creativity, life skills, and connection to the seasons. These projects are designed to be meaningful, not messy – think beauty, function, and nature all wrapped into one. If you haven’t grabbed the full plan yet, you can check it out here – it’s perfect for adding intentional, joy-filled crafting to your rhythm without overwhelming your schedule.
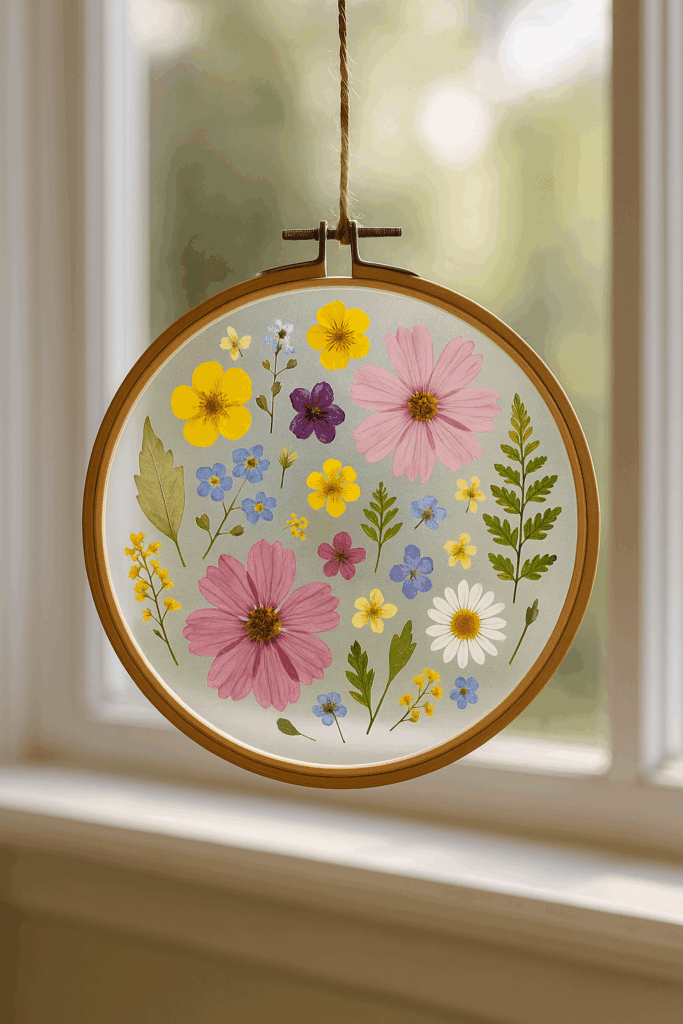
1. Pressed Flower Suncatchers 🌸
This spring craft encourages kids to collect and press flowers from your yard or neighborhood, then turn them into stunning suncatchers that brighten up your windows. They’re easy to make using contact paper or laminating sheets, and you can frame them with embroidery hoops or cardstock if you want to get fancy. Perfect for gifting, decorating, or just soaking in how pretty they are!
Materials needed:
- Fresh flowers and greenery (pressed for 1–2 days) or you can snag these
- Contact paper or laminating sheets
- Scissors and twine
- Optional: embroidery hoops or cardstock frames
1️⃣ Collect and press your flowers between books.
2️⃣ Once they’re dry, arrange them between two sheets of contact paper or laminate them.
3️⃣ Cut into shapes or place in hoops for hanging in sunny windows.
Cut cardstock into bookmark-sized strips.
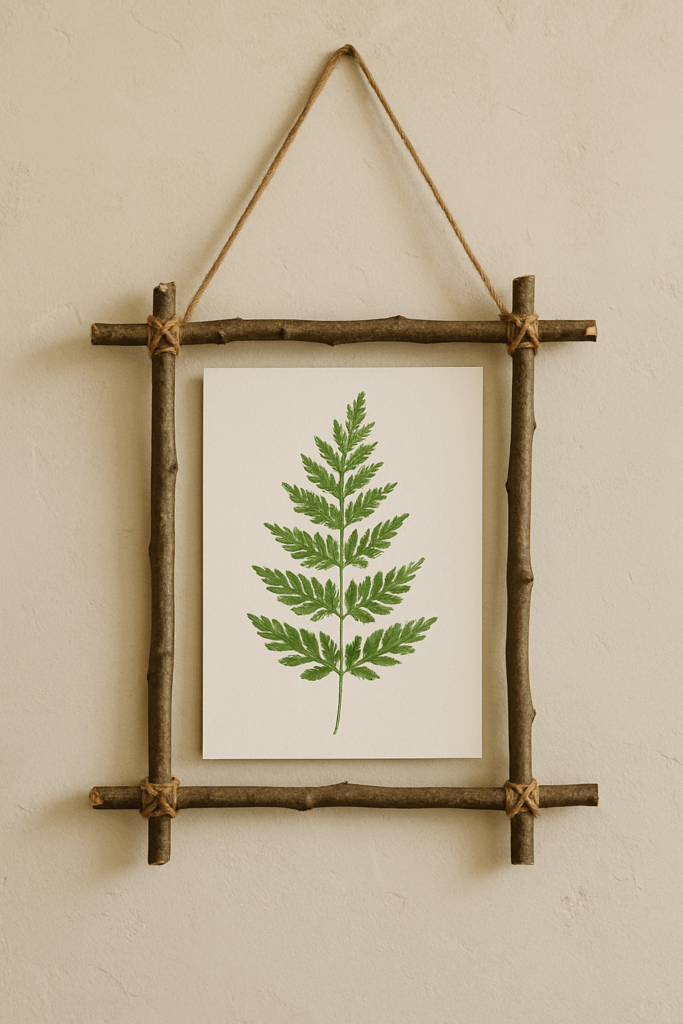
2. Twig Picture Frames ✨
This Spring craft turns a pile of backyard sticks into rustic, charming picture frames. Kids can gather twigs, glue or tie them into a square or rectangle, and attach a cardboard backing to hold a favorite photo or Scripture. It’s a sweet way to display memories or truth around your home. Hang them with twine, prop them on shelves, or gift one to someone who needs a little joy!
Materials needed:
- Twigs or small branches (about pencil thickness)
- Hot glue or twine
- Cardboard for backing
- Optional: Washi tape or ribbon for hanging
Instructions:
1️⃣ Create a square or rectangular frame shape by gluing or tying twigs together.
2️⃣ Attach a cardboard backing and slip in a favorite photo or Bible verse.
3️⃣ Display by propping them up on a shelf or hang them on your wall
3. Beeswax Dipped Leaves 🐝
This one’s a showstopper – and a sneaky science lesson, too. By dipping fresh leaves into melted beeswax, kids get to preserve the texture and shape of each leaf while giving it a glossy, golden finish. The result? Bookmarks, garlands, or table décor that lasts far beyond spring. This spring craft has a big wow factor, and it gives kids a whole new appreciation for God’s intricate design in every leaf!

Materials needed:
- Beeswax pellets
- Leaves (fresh but not too wet)
- Double boiler or old tin can
- Parchment paper
Instructions:
1️⃣ Melt beeswax in a double boiler (pot of simmering water with a smaller bowl or can set on top).
2️⃣ Carefully dip your leaves into the wax, shake off excess, and lay them on parchment paper to cool.
3️⃣ Use them as bookmarks, table décor, or string them into a garland.
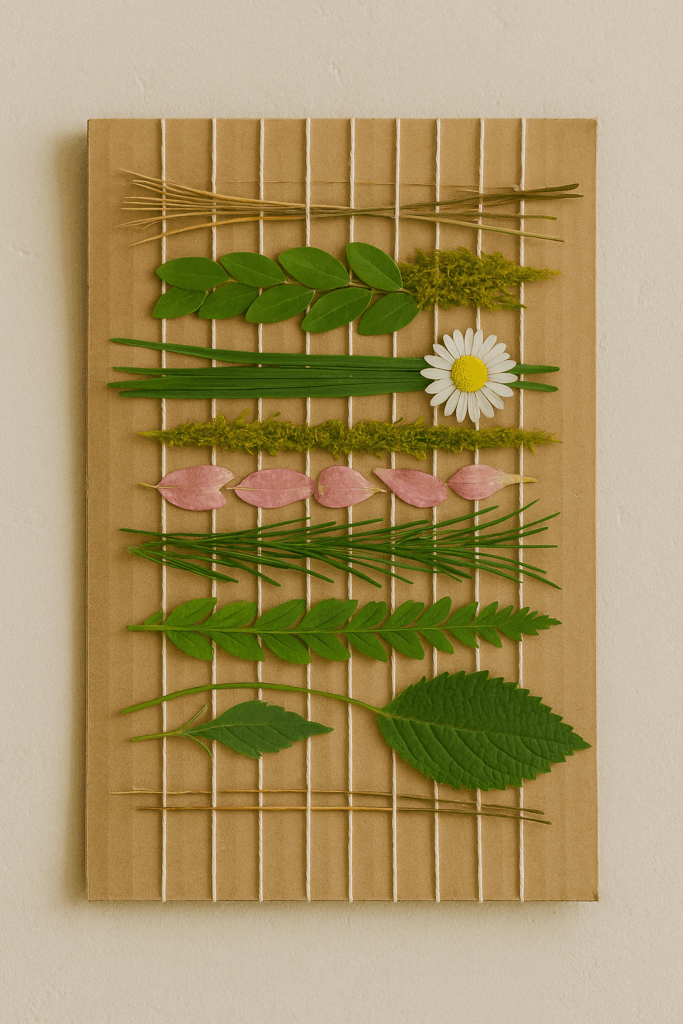
4. . Nature Weaving Boards 🍃
For this tactile, hands-on project – kids create a simple loom from cardboard or a wooden board and weave in grass, petals, feathers, and more from a nature walk. It’s a wonderful way to slow down, notice textures, and build fine motor skills while creating something beautiful! Each weaving turns into a unique piece that individually represents each child!
Materials needed:
- Cardboard rectangle or small wooden board
- Yarn or twine
- Scissors or utility knife
- Natural materials from a nature walk (long grass, leaves, flower petals, feathers, pine needles)
Instructions:
1️⃣ Cut small slits along the top and bottom of the board, about ½” apart.
2️⃣ Wrap the yarn around, slotting it into the slits to form a simple loom.
3️⃣ Kids can weave in the natural treasures they collected—over, under, over, under—until they’ve built a one-of-a-kind tapestry.
4️⃣ Display it proudly or gift it!
Final Thoughts
The best part of these Spring craft projects is how they invite your family to slow down and really experience the season. Take a nature walk before you begin, gather supplies together, and enjoy the conversations that naturally happen as your kids creative gifts come alive!
Display their work in sunny windows, on walls, or as gifts to friends and family – it’s a beautiful way to brighten someone’s day. Whether you’re doing one craft or all four, these Spring handicraft ideas are about more than just making things – they’re about making memories!
🌿 Want more monthly handicraft plans? Sign up here!